Tuesday, March 31, 2009

BLOG CANDY for Celebrating 5,000 hits!!

This is very exciting for me and I hope it will prove to be exciting for you too! I can't tell you how happy I am that my blog has been visited 5,000 times (and climbing) by people who share in my passion to papercraft!
So far this has been a very rewarding experience for me and I can't thank you all enough for visiting my blog, encouraging me by visiting and even sometimes leaving me some love in the comments section! I get some praise (upon request) from my family, but it always feels good when another card maker or scrapbooker finds something they like in my work! Call me vain, but I like the pats on the back! :-)


So to celebrate this occasion, I have a little package put together to give to


ONE LUCKY WINNER!!


Here is the BLOG CANDY that I will be giving away this Sunday, April 5th, 2009.


Included in this package is:
  • MM Chloe's Closet Paper Pack (18 sheets double-sided)


  • MM Chloe's Closet Blossoms and Buttons (136 pieces)


  • MM Chloe's Closet Trims (set of 6, 1 yd ea.)


  • Chloe's Closet Stick Pins (30 pins)


  • 2 Cuttlebug A2 Embossing Folders (Number Collage and Script)


  • 2 Cuttlebug Dies (Funky Squares and Funky Circles)


  • 2 Colorbok Chipboard Shaped Albums (Butterfly and Flower)


  • American Crafts B&W Ribbon Pack (24 feet total)


  • Hero Arts Art Flowers (Pastel Collage, 24 pieces)


  • Studio 18 Dimensional Stickers (12)


  • Jolee's Jewels Swarovski Elements (30 pieces)


Not pictured but also included in the BLOG CANDY is

  • One FREE Bucket of Cutting Files from the Wishblading Well (For my friends with electronic die cutting machines. (Click here to see available buckets)

Now that I have your attention...


do you want to know how you can win this BLOG CANDY?


It is simple and you can have up to three chances to win!!


TO GET ONE CHANCE TO WIN


Simply leave a comment on this posting of my blog and tell me one thing that is on your bucket list. A bucket list is something that you want to do before you "kick the bucket." You can see my Bucket List posted down the right side panel of my blog!


TO GET A SECOND CHANCE TO WIN

Post an entry on your blog that talks about and links to the BLOG CANDY that I am giving away. It is a way that you can spread the news to others and a way that people can learn about my blog. (Remember, one of the things on my Bucket List is to be chosen to be on a DT for a stamp company! Wink!)

Be sure to add a comment (can be included in the bucket list one from above or it can be a seperate one) that includes a direct link to the blog posting that talks about my BLOG CANDY (not just your main blog address.)

Copy and paste this link to give to your blog readers...

http://mybucketoverfloweth.blogspot.com/2009/03/blog-candy-for-celebrating-5000-hits.html

If you don't have a blog than list the link above on an online community forum that you belong to (be sure not to break any rules) and leave a link to the posting in your comment to me.


TO GET A THIRD CHANCE TO WIN


Become a Follower of my blog. Simply click on the gadget to the right and sign yourself up as a follower. Hopefully you like what you see enough that you will want to come back and see new creations, but at the least this way you will find out also when future BLOG CANDY and FREE Cutting File GIVEAWAYS are posted!

I will be leaving this posting at the top of my Blog until Sunday when I draw randomly for the lucky winner of the BLOG CANDY.


Scroll down to see new posts and more paper craft creations!

(Edited to add that I couldn't figure out how to keep this post at the top so I will be providing a link to this blog candy on each new post until the contest ends!)


Have a great day and may your bucket always overflow with Good Fortune!

Monday, March 30, 2009

Happy Monday!!

Usually Mondays are days that we moan and groan about but for me it is turning out to be quite a nice day! In fact, as far as getting called in to work, the whole weekend was nice too! It is rare that I not get called in atleast once over a two day period. And today is day three and still no calls!! My streak will end this evening because we have a scheduled c-section for 5:30. I am not complaining though! If I can get a little reprieve like I did these past few days, I can make it through the next unbearable stretch of work I get!


So, you aren't here to listen to me talk about work are you?? But since work has been kind of slow, it means I have had some time to make cards!! I have some to show you!


I have three cards to share with you today! Two are Easter cards and one is a birthday card for my dear friend Donna's son who is turning two!


The first Easter card uses a Penny Black stamp and will be posted on their challenge blog as well as onto the Sweet Challenge Sunday Sketch Challenge blog since I used their sketch!


Here is the first Easter card...


The Fine Print: DP: DCWV Nursery Baby Boy pack; CS: The Paper Co.; Stamp: Penny Black (image), SU (Sentiment); Ink: Amuse black, Copic Markers and Sakura stardust Gelly Roller pen; Ribbon: Joann's (Twill Tape), Target (Orange dotted); Dew Drops: Stamping Bellas; Nestabilities; Flowers: unknown.

The second Easter card was made using my brand new stamps that I got from Flourishes. The little chicks (that are oh so cute) come in the set called Signs of Spring. I love everything in this set so I am sure you will be seeing more of it!

The sketch for this card coincidentally works for two different sketch challenges. The first one is from SCS for the Clean and Simple (CAS08) challenge for today but it is just flipped. The second sketch artist who gave us basically the same sketch challenge was Kazan (sketch 23) from 2 Sketches 4 You. I am not typically your CAS kind of girl, but it really is a challenge and that is what "challenges" are all about right?? I kept finding myself wanting to add more layers and embellishments. It also uses the Timeless Tuesdays Challenge on the Flourishes blog which was to use embossing. I added the buttons by embossing them with my Cuttlebug.


I liked how this one came out and will be giving it to an awesome friend of mine who lives in NY. Her name is Kim; and as far as chicks go, we have always stuck together and have helped each other through some difficult times! (The latest thing she did for me was help me get through my wedding day by bringing me a bottle of wine to drink while I was getting my hair done... she really knew what I needed at that moment! LOL!)


Ok, I digressed!!! Here is the card...


The Fine Print: DP: MM Flower Patch paper pack; CS: Georgia Pacific; Stamps: Flourishes; Embossing Folder: Cuttlebug (Just My Type); Button: unknown; Circle Punch: EK Success; Nestabilities; Ink: Amuse and Copics.


Finally the last card I made is the Birthday card! Isn't it fun to create things for little kids? You get to play with adorable images and also bright colors that we often don't get to use.


The sketch for this card also comes from the 2 Sketches 4 You website and is the bonus sketch this week. I think it is a great sketch that I can see using again! I also incorporated a challenge from the Cuttlebug Spot on this card. The challenge this week was to use your Cuttlebug embossing folders twice on the same object. Look below and you will see that the lower circle highlighting the number two was first run through the Cuttlebug using the Swiss Dots folder, and then a second time using the Number Collage folder.
I highlighted the dots by rubbing my inkpad over the embossing before adding the second folder to it. Then I accented the number two by drawing around it with a souffle marker! Kind of cute I thought! Take a look at their website and you will get lots of ideas for combining more than one embossing folder onto your projects!

So here is the card that sweet little Brock will get...


The Fine Print: CS: The Paper Co.; RP: DCWV Paper Stack; Stamps: CC Designs (Image from It's My Birthday) and Penny Black (Sentiment); Ink: Amuse, Copics, Souffle and SU; Embossing Folders: Cuttlebug; Nestabilities.


Here is a close-up of the double embossing! Kind of cool huh?


Well, that does it for me today! If things go well tonight I hope to get a little more time in to make some more Easter cards! Easter is going to be here before we know it!
Less than 200 more hits to my blog and it will be BLOG CANDY time!! I will try and show you tomorrow what is going to be up for grabs!! Keep coming back and may your bucket be overflowing with warm fuzzies as soft as Easter bunnies!!

Sunday, March 29, 2009

Happy Birthday Michelle!

While I am writing this, it is still the 29th of March (but by the time you are reading this it is probably already the 30th.) Today is my oldest daughter Michelle's birthday! She and her boyfriend went to Disney to celebrate, so we will get together hopefully later this week for a family dinner. I can't believe that she is 24 years old. In some ways it seems just yesterday that she was born and I held her in my arms with such adoration!


Isn't it funny how when you have your first child you think that there couldn't be anyone that you can love any more than you love them? I remember specifically feeling that way when I first held Michelle and again when I was expecting my second daughter. Well thankfully, when you have more children God somehow gives us even more love to share with them too!


Michelle is growing up to be such a responsible young lady. She is currently employed at a local Police Department as a call taker training to become a dispatcher. She loves her job and is great at it! Michelle has lived out of the house for many years now and is really starting to understand what it takes to make it on her own! (Thank God!!) I am so proud of her and just love how our relationship changes as she matures.


Since I shared some of the layouts I had made of Ricky when it was his birthday back on March 1st, I thought it was only fair to do the same for Michelle!


So please enjoy some scrapbook layouts that I have created over the years of my first born daughter Michelle!


Michelle was a Cheerleader one year for our community's Football Team!


Here Michelle is getting Fiddle lessons from her Granny (my mom!)


Michelle's Ninth Grade School Year layout


This layout is so old that she doesn't even have this car anymore!! LOL!


This is one of my favorite layouts of Michelle and her sister Leah!


I didn't start scrapbooking until my kids were a bit older. So I don't have any layouts completed yet of Michelle as a baby. It is daunting to think of how far behind I am on scrapbooking. I have tried to make an album of each of my kids' school years on top of all the family photos that I want to scrap also! I figured I will just keep working at it layout by layout! I just hope I get more caught up before my kids start having kids!

Thanks for looking at my beautiful daughter! It is a pleasure to share her with you! She is one incredible young woman and I love her dearly!


Happy Birthday Sweetie!!


I will be back on Monday (schedule willing) with some cards I made on Sunday!


God Bless you and may your bucket be overflowing with many scrapbook pages of your loved ones to look through! Posted by Picasa

Saturday, March 28, 2009

Good NEWS!

Well that is actually the title of the latest card I created and want to show to you, but it really is fitting for me too!!

First of all, the Unity Inspirational Blog Hop was amazing! Did any of you try it?? It probably took me between three and four hours to get through all of the approx. 215 blogs that were on the list, but it was really worth it! I was so inpsired after seeing many of the projects created that I ended my blog hop over at the Unity Stamps site! The good NEWS is that I bought some more stamps!! I can't wait to get my new goodies!


Here is what I ordered...


  • Good Times (large word perfect for SB layouts... it was on sale!)

  • 6 Pack Unity Essentials Bundle Pack (it has those adorable trees in it!)

  • Quote Bundle Pack

  • You + Me = Happy (Fell in love with this during the blog hop!)

  • Two of the Eco Chic sets (one of you might be the lucky winner of the second set!)

The extra Eco Chic set that I ordered brings me to my other good NEWS!! Can you believe that I am about to hit 5,000 hits on my blog?? With all the traffic from my tutorial being featured and now the traffic from the Unity Blog Hop, my numbers are just climbing right up there! I really appreciate you guys and will reward you with a chance to win some BLOG CANDY when we hit 5,000! I am sure it will be this week!! How exciting!!

Another bit of good NEWS is that Susanna Boyd (The Barefoot Stamper) has selected one of the cards that I made recently to be featured in her Card of the Week section of her blog. If you don't follow this blog, you absolutely should. She peruses a bunch of blogs and picks some of the best to share with her readers. My Black Tie Affair card is the one that she featured in the Wedding category. I am so honored that she chose my card!!! Thanks Susanna!!!


And finally the last bit of good NEWS is this card that I created!

Do you get the connection?? I used the word NEWS as part of the sentiment (it says "a little birdie told me... about your good news") and I also used the NEWSpaper as one of my background papers???

The Fine Print: DP: Homemade newsprint background (technique explained below), DCWV (All Dressed Up); CS: The Paper Co. (Gray and Black); Stamps: SU; Bird Diecut: The Wishblading Well (Lil Bucket of Birdies); Ribbon: Papertrey Ink; Ink: Amuse; Modge Podge.

I was inspired to make this card after seeing this awesome picture from Glenda Mosher. Her inspirational blog was where we were to find inspiration for our Inspiration Challenge (IC173) at SCS on Saturday. Well, it wasn't very hard to be inspired by her because her paintings are just lovely! She made the picture that I chose to use using pieces of newsprint. That gave me the idea to add pieces of newsprint to my card! I really like the way that it turned out!

How I made the Newsprint background paper:

To make the newsprint background, I pulled out an old newspaper from our recycling bin (gotta go green when you can!) and tore it into small pieces of random sizes. On a piece of plain white cardstock I painted on some Modge Podge. Then on top of the Modge Podge I randomly placed the newspaper strips to cover an area that I thought would be big enough for my card. Then I covered the layered strips with more Modge Podge and let it dry completely before cutting it into the shape I chose.


I will say that you might want to be careful with what part of the newspaper you choose. Would you believe that I actually had a strip of paper that was from the Obituary section? How morbid would that have been to give to some poor person trying to celebrate! LOL!


The color combo for this card comes from SCS also. It is the Limited Supplies Challenge (LSC213) from Friday. We were only allowed to use Black and White. Gray of course is a shade of those so it was allowed too!

Thanks for letting me share my good NEWS with you! It's been a really great weekend!

Have a great rest of the day and may your bucket be overflowing with good NEWS!!!

Unity's Inspirational Blog Hop

Coffee and Friends (and Unity Stamps) Are the Perfect Blend!


Thanks for visiting my blog today. By doing so you are participating in Unity Stamp Company's World Record Inspirational Blog Hop! Follow along and you will be greatly inspired and in awe of the wonderful stamps that they produce! Click on the blinkie on the left and visit their site to get your stamps today!

If you are following along in the hop then you came to me from the ever so talented Ann Marie. Her project is adorable isn't it??
Well here is what I have to offer...


The Fine Print: DP: unsure pack of PP, CS: The Paper Co; Stamps: Unity (Coffe House and Journaling block with flourishes), Inkadinkadoo (girlfriends drinking coffee), Dawn Houser for Inkadinkadoo (Sentiment); Flowers: Prima (Red and green): Flower Center: Petaloo; Rhinestones: Darice (clear rhinestones painted red with Copics); Ink: Amuse (black), SU (Blue Bayou), Copic Markers; Nestabilities Label Four. Technique used: Paper Piecing.


My Favorite Quote: May your bucket always be overflowing!


If you happened upon my blog and want to take part in the Unity Inspirational World Record Blog Hop, please START HERE.


For the next blog stop click HERE!


Thanks so much for looking and have fun hopping to all the blogs!


Yesterday's post went up rather late in the day so scroll down for some more cards I made! Two of them use another Unity stamp!!


May your bucket always be overflowing with blogs filled with great inspiration to inspire your creativity!

Friday, March 27, 2009

More Challenge Cards to Share!

Thanks so much to everyone who stopped by yesterday after visiting the Cuttlebug Challenge Blog where my tutorial was featured! And of course I really appreciate all my faithful followers who stop by on a regular basis! I am glad that I might have something here that will inspire you in some way and I promise to you to always strive to do just that!
If it weren't for all the challenges that are always posted everywhere, I am not sure I would find enough inspiration within myself to make all these cards I need to make. But thankfully, there is never a shortage of challenges to choose from to help me find some direction in which way to go when creating cards!

So, on to today's cards I am posting! I had this first one ready Thursday, but didn't post it so I could focus on the tutorial and Free file giveaway. This card uses Wednesday's Sketch Challenge (SC221) over at SCS. Here is how I interpreted that sketch!

And here is the inside of the card...


The Fine Print: DP and CS: Basic Grey; Stamp: Holly Berry House (image), and SU (sentiment); Embossing Powder: Custer's Last Stamp; Gold dot embellishments: Darice; Gold Stickers (corners and strips): Flowersoft; Ink: SU (Chocolate Chip) and Stampendous Embossing ink); Ornate Brad: MM (painted gold with Elmer's Painter opaque pen).
I bought this "Cautious Crocus" Holly Berry Stamp from a stamp store that I found up in Spring Hill. This isn't my usual style, but when this image is stamped up and layered like they recommend, it really is stunning! Don't you agree? I might be giving this to my sister in-law whose birthday is in early April.

Here is another view of it showing the dimension and layers of the card. The image was stamped five times to get the look you see here...


I really love these metallic stickers I found at another Stamp Store in my area. They are made by the makers of Flower Soft. They stick wonderfully and are so easy to apply to my cards. I think they really add a punch. As you can see in the picture of the inside of the card above, I added one stright strip to also accent the inside of my card. I love all the gold in this card! It makes it so rich looking!
Here is a closeup of the metallic stickers on the outside of the card....


The brad pictured below started out as an antique gold finish. Since it didn't match the other gold's well enough, I painted it!


The I used is an opaque metallic pen by Elmer's pictured below. It dried very easily, but I heat set it just to be sure the gold wouldn't rub off.


My next two cards are made from the same papers and sketch and qualify to fit into three challenges.
The first challenge is the sketch that came from Stamps and Smiles (SASSC8)!

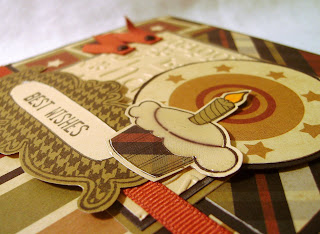
The second challenge is from the Cuttlebug Challenge Blog (CBI24) where we had to use a cupcake (and of course I also used my Cuttlebug embossing folder for part of the background.)

The third challenge is from No Time To Stamp (ssnotime80) which was to combine either stripes or dots with other patterned papers. As you can see I combined a lot of different patterns on these cards!

I had two masculine birthday cards that I need to get done, so these challenges fit the bill to make these two cards!

The Fine Print: DP: Paper Salon Rugged 6x6 collection; CS: The Paper Co.; Stamp: Sarah Beise (cupcake), Unity (Sentiment Frame) and SU (Sentiment); Cuttlebug embossing folder (Happy Birthday); Ink: Amuse black ink and Copic Markers; Ribbon: ebay purchase; Brads: Bazzill; Glossy Accents. Technique: Paper Piecing.


Here is a closeup of the first one....


and the second one....


Don't you just love the Unity houndstooth frame that accents the sentiment on these cards? That is another one of the stamps from Unity's Kit club! I love their stamps and keep trying to find ways to use them in my creations!


Tomorrow be sure to stop back by because I will be participating in the World's Largest Inspirational Blog Hop hosted by Unity. If you like Unity stamps as much as I do, you won't want to miss the chance to see lots of their stamps made into awesome projects by Unity friends.
I hope you will come back tomorrow!

Have a great friday night and may your bucket overflow with boundless energy to accomplish everything on your to-do list today! (Today has been a day off for me and I have been checking things off my endless list... Woohoo!)

Thursday, March 26, 2009

I won a Challenge and am a Feature on the Cuttlebug Challenge Blog!

So a couple of days ago I told you that I had some exciting news and couldn't tell you until Thursday! One of you guessed INCORRECTLY that I was pregnant (Joni!) You would have to shoot me if I were pregnant...I have already moved on to the grandparenting stage and wouldn't think that being pregnant was EXCITING!!! LOL!

But what is exciting is that Maggie from the Cuttlebug Challenge Blog liked my entry (shown below) into their contest about using our punches in a different way and I was chosen as the winner!! I am being featured on their blog today where you can see the tutorial that I wrote on how to create a picket fence using a border punch and your Cuttlebug. I am so excited about this I can hardly stand it!!


To see the Fine Print about this card, visit the original blog post here!


Then, as if just being selected wasn't enough, I also won an adorable camera strap from Shealynn who sells wonderful straps from her Etsy store. She came up with the clever idea to dress up camera straps. She has an array of straps available in her store that are fresh and funky. If you like the look of the bold prints of Vera Bradley bags then you will love her looks too! Creating Keepsakes chose her as the SOY winner in 2007 and she has been featured on Ali Edwards site too!


Thanks Shealynn for your generous gift!! (I love that name, it happens to be similar to my DGD Shaelynn, just spelled differently!)


If you were interested in having the tutorial I made to keep for a reference, I have turned it into a pdf file that you can download and save on your computer.


Click the picture below if you want to download the tutorial...

I haven't forgotten about my cutter friends either who might think I am crazy for manually cutting anything out when I have a fabulous KNK electronic die cutting machine to use. But sometimes it is just as easy to pull out the little Cuttlebug than to pull out the big yellow beast! LOL! Plus I want to make sure that my friends without electronic cutters have ways to make cute embellishments for their cards and layouts too!

Click the picture below if you want to download the FREE Picket Fence file that comes in the Wishblading Well's Spring Bucket. The download includes die cutting file for use on electronic die cutting machines that are compatible with any of the popular die cutting machines The one download contains GSD, KNK, WPC, AI and SVG formats...


Below is a picture of the complete Spring Bucket sold by the Wishblading Well. Not all of our files are up for sale yet at Paperthreads so if you were interested in buying any one of the individual files or the complete bucket shown below for just $14.99 please click here for information on how to contact us!

Click on the picture above to see our Gallery of the Spring Bucket from the Wishblading Well

Thanks for stopping by! I hope you enjoy your goodies and have fun making your own Picket Fences for your paper crafting projects!

Have a great day and may your bucket overflow with your "White Picket Fences" that represent what you have always hoped to achieve in your life!

Tuesday, March 24, 2009

A Special Birthday Card for a Special Daughter!

On March 29th my oldest daughter Michelle will be turning 24! I can't even believe that so much time has passed since I first held her in my arms! My how time really does fly!

I wanted to get her card done a little early so I could mail it out to her because she will be out of town on her actual birthday. To give you a little history on why I chose to make this card for Michelle, you would have to realize that our family spent about 2 1/2 years in Japan while her father was serving in the Navy. I took Michelle to Japan when she was just three months old and her sister Leah was born over there.


We have always been fond of Japan and things oriental since then and we feel a small connection with that other side of the world. When Michelle was little she was given a doll from one of our neighbors named Makinosan (pronounced Mah-kee-no-san). We have been saving that doll every since and the Geisha lady on the front of the card reminds me of the face of the doll that Michelle was given. Our neighbor nicknamed Michelle "Michan" (pronounced Mee-chan). We have really neat memories of some of the culture over there and I know it will always be special for my daughters to recall that they lived in Japan!
So here is the card I made for my oldest daughter Michelle...


The Fine Print: DP: Red Asian Paper (Far and Away), Black ornamental (MM Fifth Ave); CS: Bazzill; Specialty Paper: Starburst Trans. (The Paper Co.); Stamps: Geisha girl unknown (rec'd in a swap), Sentiment: Custer's Last Stamp; Silver Corner Sticker: Flowersoft; Ink: Amuse and Copics; Pearls: Darice (?); White Satin ribbon and Red Flowers: unknown. Red Fun Fur: Lion's Brand from Joann's.


The sketch for this card is using another one of Julee's Mojo Monday Sketches! They really are great sketches to use and if you haven't tried it, then please do, you won't be disappointed.


The color combination that works so well with the Asian Theme is from a new Challenge Blog that I just started following called ResQ Challenge. A great group of ladies, some of whom I have met through Stamp TV are hosting this blog to help others find their crafting mojo when it goes dry.

This week's challenge was the first one and the theme was "celebrations." I chose to use the Birthday theme and then we also had to go scavenging depending on what month our birthdays fall into another person's gallery looking for inspiration of a certain type. You can find the details on the blog under the description for the challenge.

I chose to find my inspiration from eliotstamps and used this picture's color combination for my card! I love red, black and white together! It is so classic and in my case, so oriental!

Thanks for looking today... I am hoping to get some more cards made today that need to get out in the mail soon. So until next time have a great day!

May your bucket overflow with fond memories of the travels you have made in your life!

Monday, March 23, 2009

Hippity Hoppity errrrr I mean Chirpity, Chirpity Easter's On It's Way!

Yesterday I managed to get the first of my Easter cards made and it really put me into the mood to do more of them! I love the colors of spring and Easter and I certainly love what Easter represents as a Christian, so this season is a really fun one for me!


I made the following card with an adorable Elzybells stamp set that I bought from Amuse Stamps. I think that the little Chick trio on the Easter eggs is just adorable!! At first I tried coloring the eggs with my Copics, but didn't have great success matching my colors with the ones on the Making Memories Flower Patch DP that I was using. So I ended up paper piecing the eggs instead and I think it came out much cuter! For a little punch I added white Souffle puffy pens where you see the white dots and stripes. The scene was created by sponging Copic ink onto the background. The grass strands are from a SU stamp.


The sketch is from SC220 Wednesday's Sketch Challenge from last week! I thought it was going to be much harder to make it work well, but after I cut out my strips, I really liked the sketch a lot better! :-) I can't believe I waited so long to try it!

The Fine Print: DP: MM; CS: The Paper Co.; Stamps: Elzybells Chick Trio, SU grass; Ink: Amuse black ink, SU Certainly Celery, Copics; Flower: Prima; Gingham Ribbon: Joann's; Rhinestone: Darice.


I got some really exciting news that I am anxious to share with you, but I will have to wait until Thursday to let you in! Be sure to stop back and visit as I hope to have some more Easter cards created soon too! My evening will be spent at the hospital tonight so I hope to find a little more time before bed to make some more cards!


Have a great rest of the day and may your bucket overflow with lots of time to play with your stamps!!

Sunday, March 22, 2009

Having a REELy great weekend!

It's been a little crazy in my world again lately!! I haven't been able to post in a couple of days because of how busy work was on Friday and because of having limited time on the computer Saturday!
I am enjoying two days off this weekend and can't believe that I have somehow scored three weekends off in a row!! That is really awesome!!
One of my husband's best friends is having a birthday this week so I did squeeze in some time to make a card for him Saturday morning. I don't know about you, but masculine cards are always more of a challenge for me! I like the color choices, but apparently I don't like the masculine images as much because I hardly have any!!
Thankfully my good friend (and SU rep) Monica was kind enough to include some stamped images in a Pay It Forward gift package that I received from her. In that pack were a couple of Stamping Bella Fellas that have been perfect for masculine cards! Since my husband and his friends are all avid fishermen, the Fella with the fishing pole was perfect for Paul's card!
So here is the card that I created...


The Fine Print: CS: SU and the Paper Co.; Stamps: Stamping Bellas (main image) and SU (backgrounder); Stickers: K&Co.; Ink: Copics; Sentiment: computer generated using Poor Richard font.
This card combines a few (no surprise there) of the recent challenges that I get from The Daily Dare. If you like to participate in challenges, this is a great blog to subscribe to because she lists lots of challenges that are ongoing with many different blogs for all the days of the week. You should check it out!
This Color Inspiration for this card came from the Stamp TV Florida Group. If you haven't joined Stamp TV then I totally recommend that you do. Gina K has outdone herself providing quality video tutorials on stamping and also in making a social network for stampers out there who share the passion of papercrafting. If you are from FL and sign up (it's free) please join in the FL group! We have a lot going on and we are still the largest group on Stamp TV!!
Here were the colors that we were inspired to use...

The next challenge was using Jen's Sketch from Saturday. She always has fantastic sketches!!


As you can see I turned the sketch on it's side and used it in landscape mode.
And finally, I also threw in the stickers which was the challenge from Splitcoast Stampers from Thursday's Way to Use It challenge! I have to admit that I rarely use stickers on any of my cards or layouts but K&Co. have always had nice quality stickers with some dimension to them. I had been hoarding these stickers for a while now and knew that one day they would come in handy.
One gripe I have is that most of the fishing related stamps and stickers are always based on fresh water fishing or fly fishing. Since we live in Florida, my husband does Deep Sea salt water fishing and I can never find stamps for those types of fish. If anyone knows of a company that sells Salt Water specific fish species I would love to know about them! I am looking for Grouper, Tuna, Redfish, etc.

Have a wonderful rest of the weekend and may your bucket overflow with lots of challenges for cardmaking!!

Thursday, March 19, 2009

I Made a Scene! And a Picket Fence Tutorial!

Usually when someone makes a scene, it is embarassing! But when I say I made a scene, I mean it literally! I made a scene using several stamps and different techniques and put them all into a card!! I had a vision in my head about the card I am showing you below. It didn't come out exactly as I had envisioned, but all in all I like the finished product and am happy to have experimented with some new techniques for me!

So here is the card that I made...


Keep scrolling down if you are interested in seeing how I made the Picket Fence using a border punch that was not for a Picket Fence!

This card's main image is the Huggybellas stamp from Stamping Bellas. (Oh how I love all of those girls!!) I also added the house image from Unity Stamps January Kit Club and some flowers and grass from SU. This card is really a blend of a lot of stamping companies! The sentiment was printed out on my computer as I didn't have any neighborly sentiments on stamps!

To create the background sky, I initially used SU Soft Sky blue with my brayer and rolled on some color. For more definition I also sponged some more blue too! The sun was a punched from a circle punch and cut to fit into the corner. Then I added some yellow by sponging also. The yellow ink is SU's Barely Banana. To make the sun rays I freehand drew little squigglies with my Sakura Gelly roll Stardust pen. I am really loving that pen and am so glad that my friend Tiffani told me about it after visiting our local Stampfest!

To create the grass I used Post-It Notes that were torn to make an uneven edge and then I sponged SU's Certainly Celery. I moved the the Post It's around to make a hill on the right and also make some dimension and layers of grass. I did the same thing to make the dirt on the very bottom of the card, but instead I stamped that with SU's Creamy Caramel.

The Bellas clothes were paper pieced with DP from Scenic Route. I love the plaids that this particular paper has. I was able to find just the right spot to stamp on by using my stampamajig (click here for a tutorial on using the stampamajig) with my stamped image on it and just moved it over the paper until I was happy with the part of the paper that was being selected. The same DP has both orange and green plaid spots. It is oh so summery don't you think?

The rest of the Bellas images were colored in with Copics. I outlined them using Cool Gray No 1 and then cut them out leaving a little bit of outline still intact. They were the last thing added to the card and were popped up with pop dots to make them appear they were in front of the fence!

Also using the stampamajig I positioned the Unity house off in the background. My attempt (since the scales of the stamps were different) was to make the house look like it is set up on a hill in the distance. The house (not being the focal image) was quickly colored with coordinating colors to continue with the sunny theme. Don't ya just love that orange house?? LOL!!

I am kind of excited about my picket fence! It was one of those things I figured out by accident and knew I would use the technique someday. Believe it or not, but it is made from a Martha Stewart Border Punch (and not the one that is already a picket fence!)

When I punched a border for a card recently I used this same punch and after trimming off an edge that was too long I serendipitously realized that the piece I cut off resembled a single picket from a fence. So that is how this idea began! To make the pickets seems wood-like I ran the fence through the Cuttlebug with the Distressed Stripes embossing folder. This helped give the fence more dimension!

Over on the Cuttlebug Challenge Blog they are having a contest to use your Cuttlebug of course, but also to use a punch in a way other than it is intended to be used. So I will definitely add this card into that challenge and see what happens!

Picket Fence Tutorial
Using a different type of Border Punch!

Edited to add the Picket Fence Tutorial Download link:

Click here to download a pdf file of the tutorial!


At this point cut them to be the size you need them for your project!


I think it came out pretty cute and knowing how to do this might save you about $15 if you have this MS Punch already and don't want to buy the actual Picket Fence one that she sells! Plus, now you can make your fence as tall as you want.

It would be cute to add hardware to this fence piece and make it a gate that might open up on your card to reveal a sentiment! There are lots of possibilities!! Have fun and I hope you give it a try. Please send me a link if you make one, I would sure love to see what you create!

Have a great day and may your bucket overflow with money-saving ideas in this tight economy!

Wednesday, March 18, 2009

A Black Tie Affair!

I absolutely loved the Technique offered this week by SCS called Ribbon Frame! I couldn't get to trying it out on Monday, but I did squeeze in a little time yesterday and then completed the card this morning.


Because the frame made from ribbon is such an important part of the card, I decided to start by choosing my ribbon and then working backwards from there to create my card. So as I was searching through my ribbons, I was leaning towards making a monochromatic card with all whites, but I couldn't find a white ribbon I liked well enough to use for this technique. So then I started thinking about black because I thought it would make a strong statement.


When I found my black velvet ribbon I knew that I had the ribbon I wanted to use and it also sent me to the wedding theme which followed! I think that Black and White cards can be so stunning and I love the formal look it can produce.


So this is the finished product that I came up with! I don't know anyone getting married right now, but I hope that someday I will know someone who is having one of those fancy Black and White themed weddings that this card would be perfect for...


The Fine Print: DP: PaperTrey Ink; CS: GP; Stamps: Image and Sentiment, Inkadinkadoo; Ink: Amuse black ink and Top Boss for embossing; Embossing Powder: Stampendous; Ribbon: Joann's; Cuttlebug embossing Folder: Swiss Dots; Rhinestones: unknown.


Excuse the few stray black embossing powders that I can never seem to prevent from straggling on my cards. I even use the powder that is supposed to prevent that, but it always seems that they find a way to remain on the card only to be accentuated once heat activated! If you have any tips about preventing that, please let me know! I also think that embossing works better with my red rubber stamps than with this acrylic set I used, but overall I really liked how this card turned out! It reminds me of a formal black tie affair that is so fun to dress up for!
Before I go I just wanted to take a minute to thank all of you who have been so kind in leaving me words of encouragement about some of my cards! It really means a lot to me and I read every one of them! My family gives me nice feedback on my cards, but it really means a lot when a fellow stamper sees something that they like in my cards and takes the time to comment on. You really help me validate why I do this which is to please the people who receive my cards! Thanks again for taking the time to visit with me! I really appreciate you and your comments!
I have noticed that I am getting close to the 5,000 hits mark! When I hit that point I will be offering some blog candy for a lucky reader out there! Keep stopping by and it will be here before we know it!
Have a great day and may your bucket overflow with people who encourage and inspire you!

Tuesday, March 17, 2009

Luck O' the Irish!

I feel lucky...Oh so lucky (sung to the tune of "I Feel Pretty" from West Side Story)

What a funny coincidence that on St. Patrick's Day the Irish girl that I am just found out that she won some blog candy! I entered one of my card creations to the Inspirational Card Sketches Blog last week and my entry was selected randomly as the winner today! I am so happy and excited!! Thanks so much Dawn!
The cool part is that I have won three downloads from The Cutting CAFE webstore. I have never tried printable stamps, so I think that is what I will do with my gift certificate! I see a lot of images that I would love to try! Thanks Regina for your generosity!!
Does anyone have any suggestions about the best way to color printable stamped images? I would think that my Copics would make the ink run... what type of coloring medium do you guys use? Please leave me a comment if you have any experience with this type of stamping. Thanks!
If you haven't ever played along, you should join in on this week's ICS challenge. It is a sketch that looks like a tag that could be added to a card front or layout. Here is the sketch for this week's challenge...


Click here for more details about the challenge and also how you could be a lucky winner for next week's drawing! I hope to have a sample for you by tomorrow or atleast some time this week!


Now on to today's challenges (and of course it is plural! LOL!!)

I made one card that can fit into four challenges... Here is the card I made...


The Fine Print: DP: BG; CS: SU and The Paper Co.; Stamps: Stems from the Definitely Decorative Gladsome Gardens set; Ink: SU River Rock, Amuse, Sakura Gelly Roller and Versa Mark Jumbo Java; Gems and Twill tape sources unknown.

The sketch comes from Julee and it is the Mojo Monday 78 sketch from her blog. The only thing I did differently was to to round the corners because I chose to use BG papers and also enter this in the BG challenge from Saturday! The color choices come from SCS today where the Color Challenge was called Krafty Riding Sun because we were supposed to use Riding Hood red, Summer Sun and Kraft with an option of using black.


These were really hard colors for me today! I ended up finding that my BG DP coordinated well with those colors, but ordinarily I wouldn't have accented those colors from the DP if it weren't for the challenge. I kind of like it because of its boldness, but it really was a challenge for me! :-)


Finally I also added gems to the card which qualifies the card to fit the challenge at Spoon Full of Sugar today! It is kind of funny that the collection of DP I used also has sugar in the name!! It is called Sugared and it's from Basic Grey.

Here is a better angle showing the shimmer it has by adding the Sakura Gelly Roll Pen to the outlines of the stamped stems.

My luck may have run out for me for the rest of the day since I will be heading in to work for at least three deliveries! There will be no green beer, corned beef and cabbage or hanging out with my husband and his friends at the local pub! Maybe next year!

Happy St. Patrick's Day to you and may your bucket overflow with good luck and good fortune!

Monday, March 16, 2009

New Car and New Stamps!!

I had two things in my life today that made me really happy!! One is that I got a new car! And the other is that my Spring Magnolia Kit arrived in the mail today all the way from Sweden!


I have been contemplating getting a new car for a while now, but I kept putting it off for one reason or another. Well today I finally decided to bite the bullet and go for it! I traded in my Mazda RX8 (a cute sporty little white car) for a Mazda Tribute (much bigger black SUV!) They couldn't be more polar opposites! But the new vehicle is going to meet the family's needs better since we have a few things to haul around when we go camping and such! And now I can easily haul my own bicycle or kayak to wherever I need them! Independence is a good thing!!


Here it is....isn't she pretty??


I am also so happy about my wonderful shipment of Magnolia stamps that came in the mail today! What a great springy collection complete with 5 full sized Tildas, one Edwin, a beehive large enough for Tilda to sit on, two roses, 4 butterflies, one sign, one ladybug and two background stamps! I felt like I hit the jackpot! If you want to sign up for the next kit they offer, you still have time to sign up for the summer collection to be delivered later this year!


I couldn't wait to get some ink on these stamps. But first I had to mount them onto EZ foam and make my index for them. I also scan all my stamps into a computerized system that I have for making it easier to locate my stamps for various needs.


So I chose to use Lauren Meader's My Times sketch #27 from Saturday. It was a cute sketch that worked perfectly for the image I chose which I am calling Butterfly Tilda. I used Basic Gray paper from the Urban Prairie collection and colored my image with my Copics to coordinate with the colors in the paper.


Here is the picture of Lauren's sketch...


Here is the picture of my completed card!


The Fine Print: DP: BG; White CS: GP; Stamp: Magnolias; Ink: Amuse and Copic Markers; Chalk; Brads: Doodlebug and Bazzill; Flowers: Petaloo and ?; Ribbon: Target Dollar Spot.

Hope you enjoy the first of many looks you will probably get of my new stamps from Magnolia!

Have a great night and may your bucket overflow with pretty images to stamp and color!!